Did you ever encounter the turmoil of adding a new module on all layouts post creation of standard menu navigation?
Well, we all know how bothersome that could be! Here we are with an easy solution, read along…
Undoubtedly, navigation is an integral part of every application. It plays a pivotal role when a user requires navigating to different modules and sections.
Static navigation is rigid, which demands rework of all modules even when a single module is to be updated/added. Planning an end-to-end navigation prior to application development is the perfect solution. However, practically it is impossible to predict all modules and create a navigation way ahead of time. The second-best solution is to setup a smart extensive set of menu items for the future.
Let’s take a look at two elaborate approaches to implement a sidebar navigation!
Approach 1: Using Fixed Left Navigation
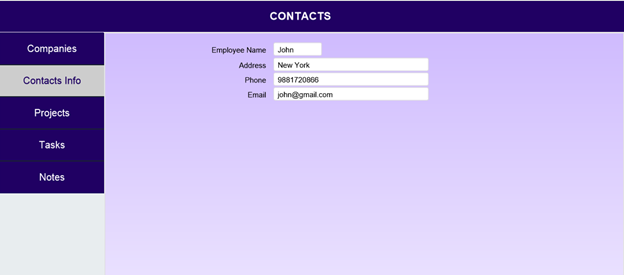
In this approach, a button bar is added on the left-hand side of the layout in advance. Each button has calculations referring to dynamic variables as button labels, with a common script to define every button action. By default, this navigation bar is visible on all layouts.
The downside to this approach, it can work for Form views, but not for List views. Additionally, the demand for more real estate in the layout of the application is another drawback that leads us to Approach 2.
Approach 2: Hamburger Menu Using Popover
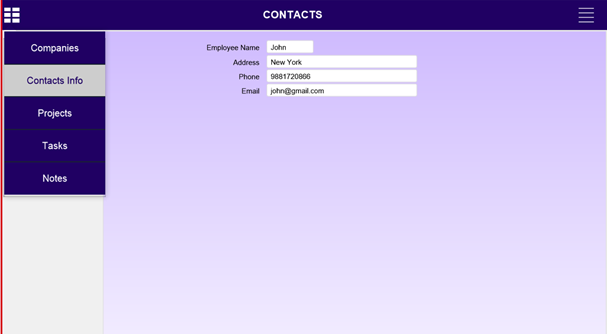
In this approach, a Hamburger menu icon is placed in the header of the layout. Clicking this will expand/collapse the popover. The popover has a button bar and it’s implementation is similar to Approach 1, with the only difference of buttons placed on the Popover. This approach works well for Form view, List view, and Table view.
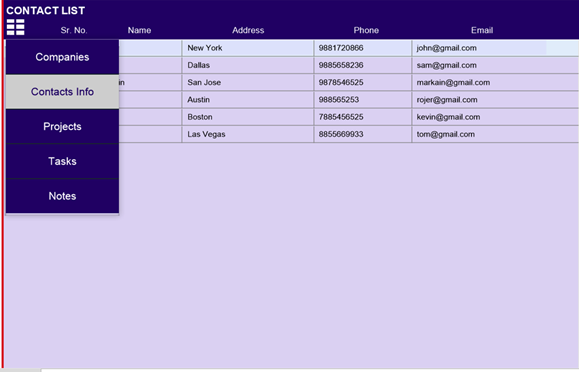
Let us take a look at the Application Implementation Steps in detail.
Step 1 – Opening Script
Create an Opening script or a Startup script to set global variable values that are used as calculation to define labels for each button segment in a Button bar.
For any new module navigation, set the global variable to the same.
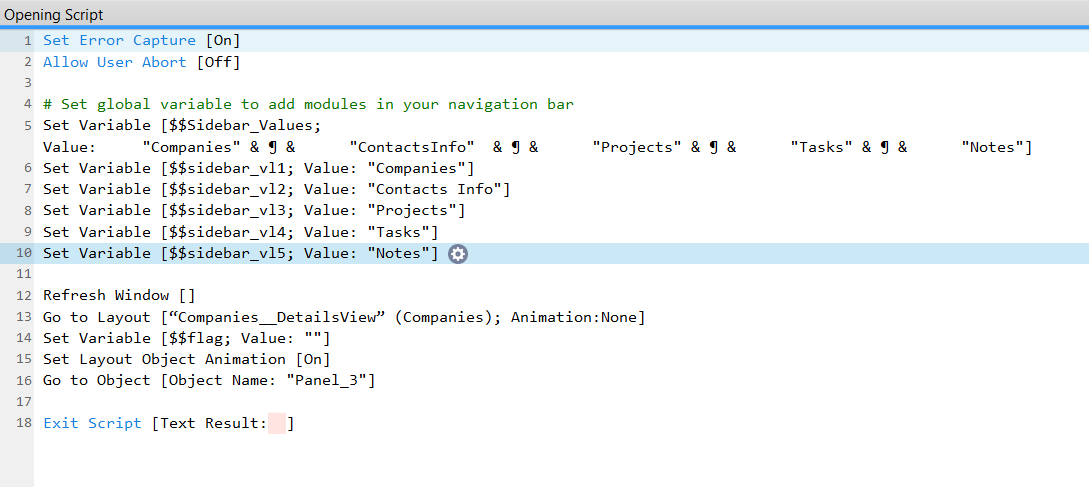
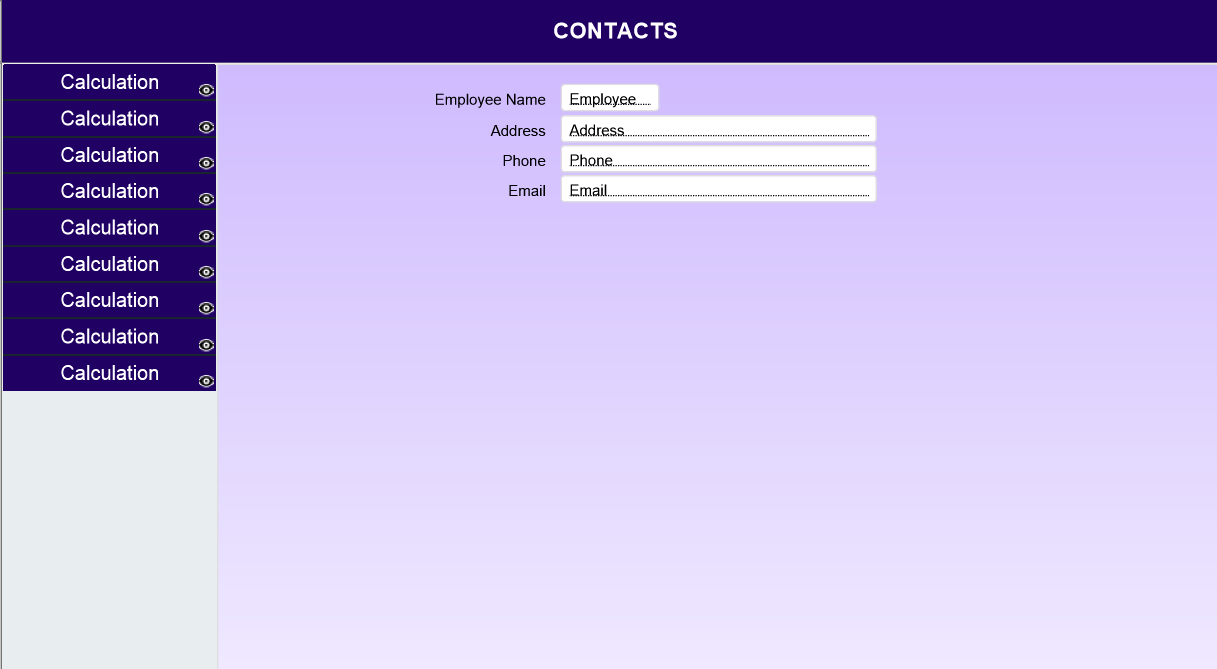
Step 2 – Specify Active button
The Sidebar_Values variable defined in the Opening script will store the list of table names, i.e. main navigation module table names. It is then used to define the active button bar segment of selected module as below.
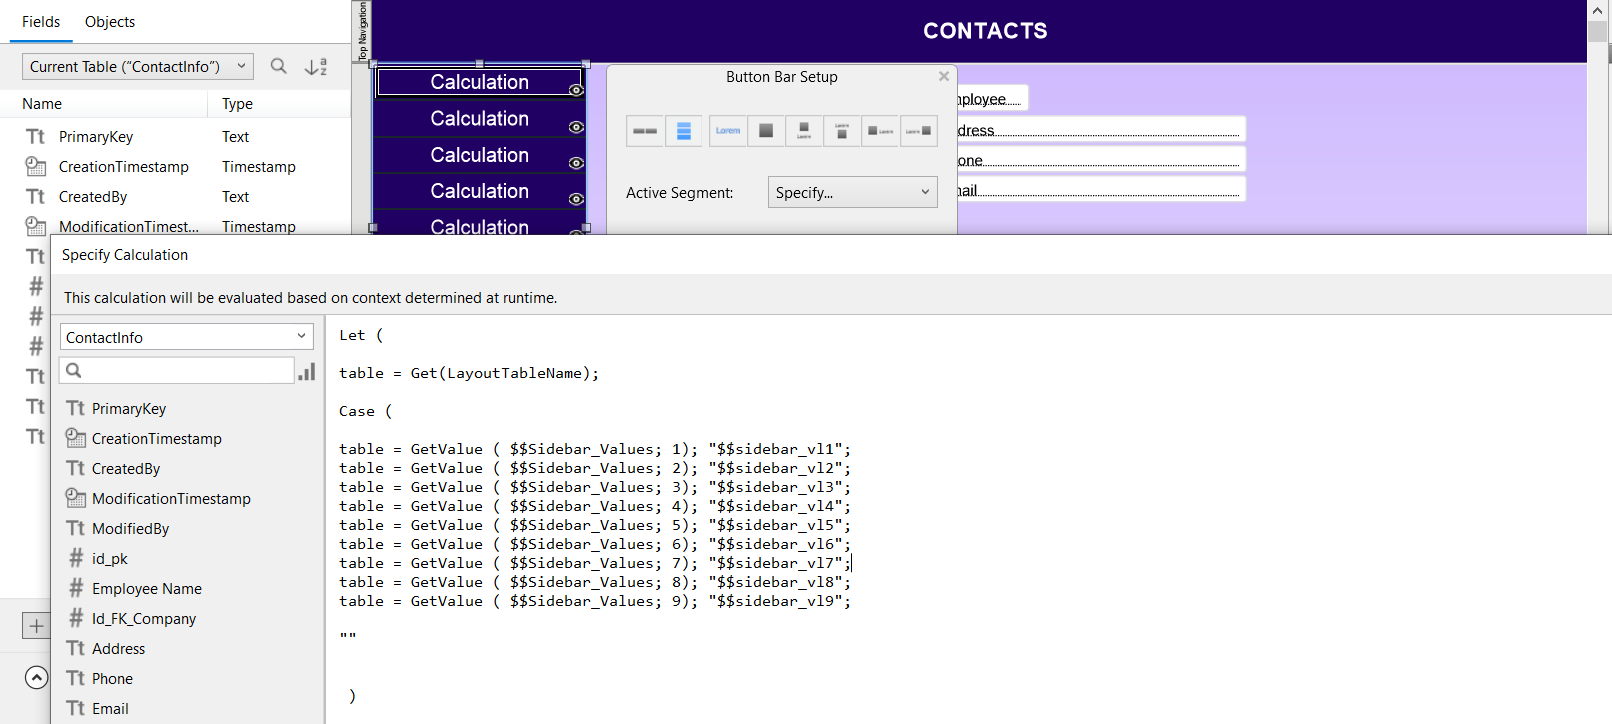
Step 3 – Main Navigation Script:
Create another script which is the main script used for navigation between modules. This script is attached to every segment of button bar, with a script parameter defined for the module to navigate.
If the user is currently on the Details view, then the application redirects to Details view of the destination module. Similarly, If the user is in List view, the application redirects to the List view of destination module.
Each layout has set icons to help navigate to Details view or List view specifically. For instance, if the user is in Details view, clicking relevant icon will help navigate to List view and vice versa.

This script checks if the user is on Details or List view and sets it to a variable. Append this variable to script parameter to get the layout where the user wants to navigate .
Step 4 – Naming convention:
Each layout requires a specific naming convention . In this case, it is <<tablename>> _<<Viewtype>>.
Here the ViewType can be DetailsView, ListView or TableView. Let’s take a look at some of these examples.
- Contact details layout will be ‘Contacts_DetailsView’
- Contact list layout will be ‘Contacts_ListView’
- Contact table view layout will be ‘Contacts_TableView’
By following the Approach 2, adding a new module is matter of few simple steps and the application is as good as new.
Hope you find this article insightful. Feel free to leave a comment or post any challenges that you may have.
Our FileMaker development experience includes handling complex project management systems, e-commerce shopping sites, cruise booking systems and more.